Knowing how to pack chargers and cables for travel comes down to six actions: sort your gear by device, test every cable before you leave, coil each cord so it wraps onto itself, bind it, label it, and keep the whole set in one pouch that stays in your personal item. Fifteen minutes of prep at home saves an evening of untangling in a dark hotel room.
Most cable problems are boring ones. A dead cable discovered at the gate, a charger buried at the bottom of a checked bag, a power bank that never left the bathroom counter because you needed it in the air. This guide walks through a repeatable system that avoids all three, whether you fly weekly for work or pack once a year for a two-week trip.
Table of Contents›
- What You Need
- Step-by-Step: How to Pack Chargers and Cables for Travel
- 1. Sort by device, then delete the duplicates
- 2. Test every cable and charger before packing
- 3. Coil each cable the roadie way
- 4. Bind every bundle so it cannot travel
- 5. Label each bundle in plain words
- 6. Separate chargers and batteries from cables
- 7. Protect the fragile parts, then close it up
- How to pack chargers and cables for travel by device type
- Common Mistakes
- Frequently Asked Questions
- Can I bring my charging cable on a plane?
- Do phone chargers go in hand luggage or suitcase?
- Can I take a 10,000 mAh power bank on a plane?
- What power banks are not allowed by TSA?
- How do I keep charging cables from tangling in my bag?
- What can I do if a charging cable stops working while traveling?
- Conclusion
What You Need
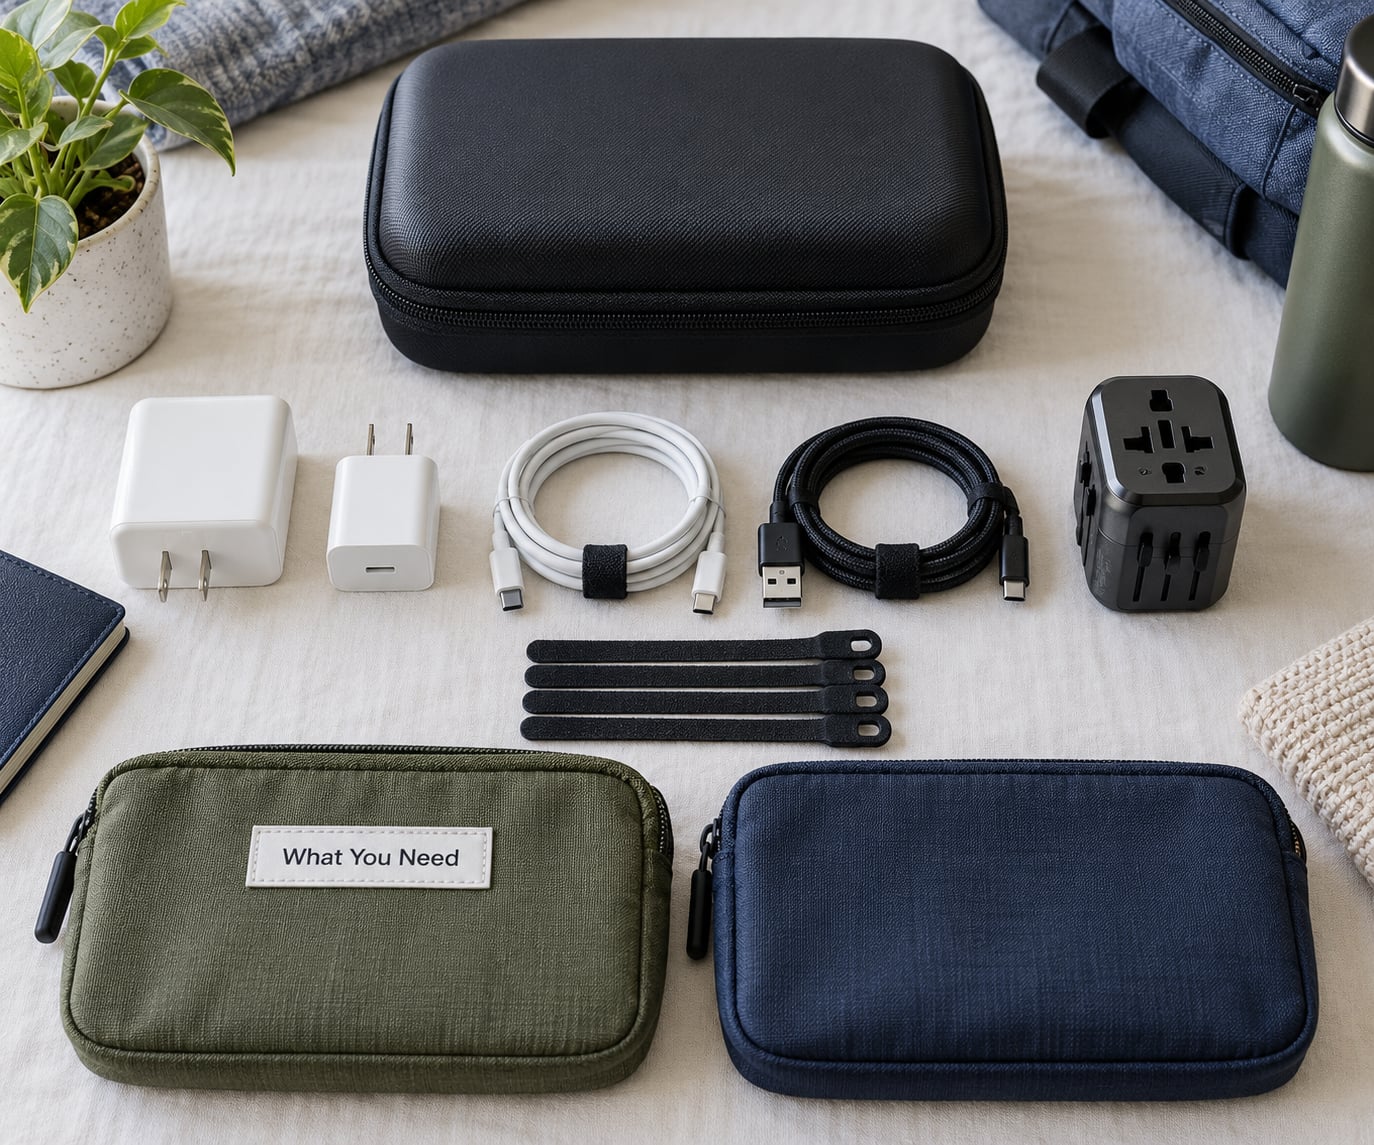
Gather everything before you start sorting. Most people discover mid-sort that the cable they need is in a drawer at home, not in the bag on the floor.
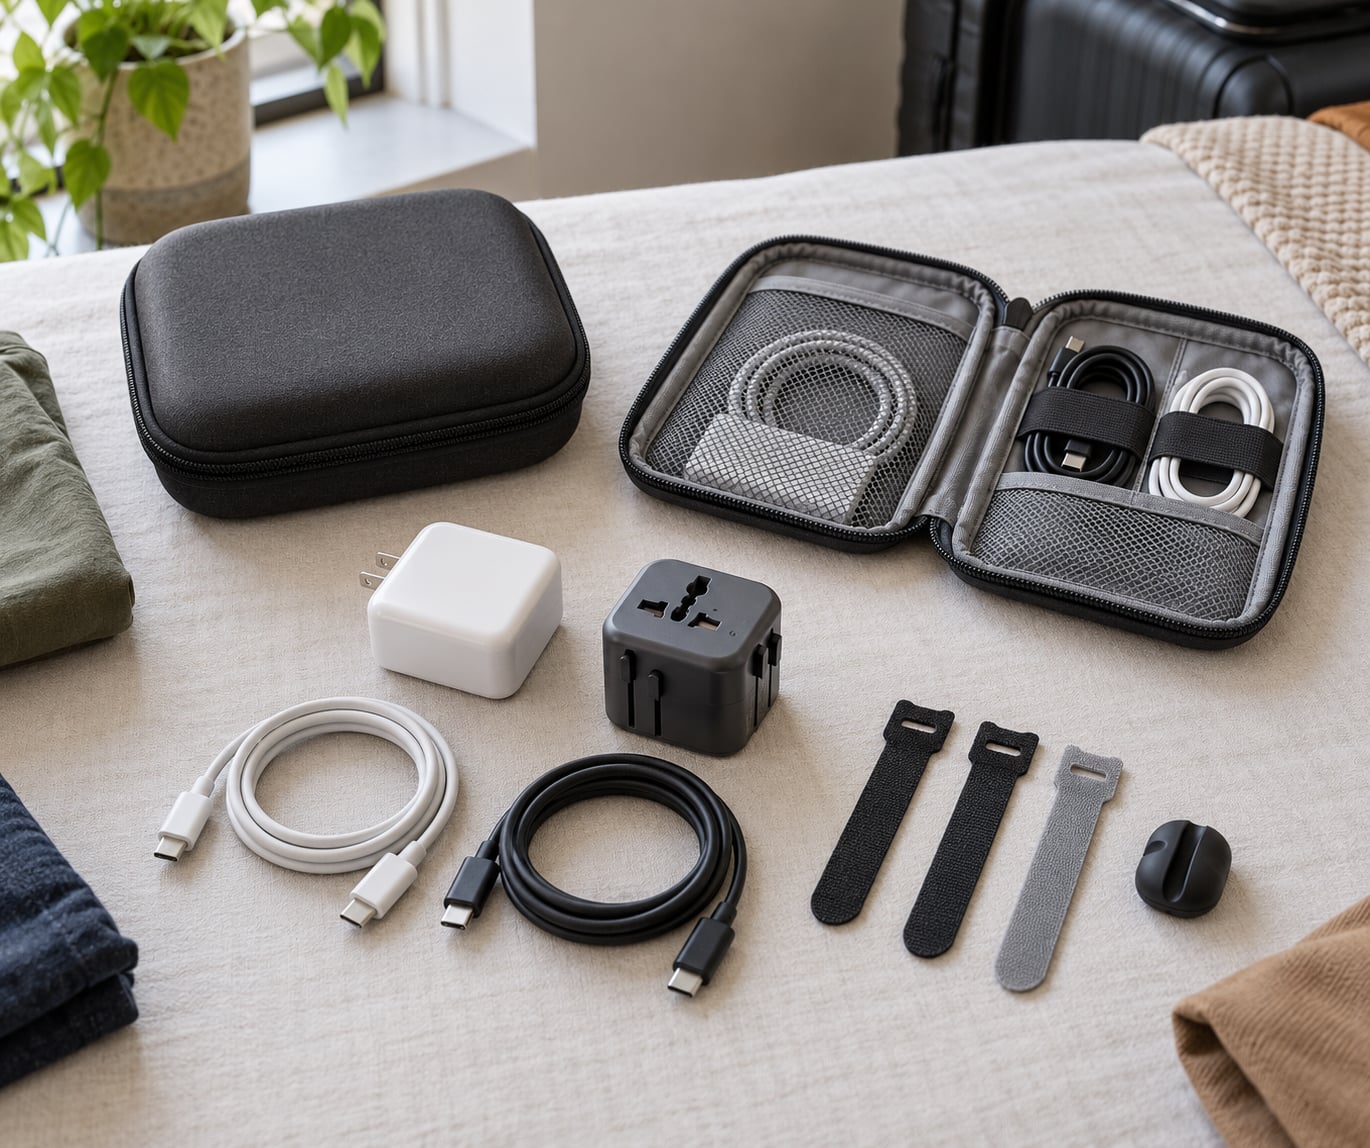
- Wall chargers: one compact multi-port charger usually replaces three or four separate plugs. A GaN charger runs cooler and smaller than older silicon models, so it takes less pouch space.
- Cables: one short USB-C to USB-C for a phone in a pocket or on a plane tray, and one long one for a laptop or tablet at the back of a seat.
- A three-in-one cable if you share gear with people on older Lightning or micro-USB devices.
- Plug adapters for each country shape you will meet. A universal adapter covers most plugs but does not convert voltage.
- A power bank if you will be away from a socket for more than a few hours.
- Cable ties or Velcro straps, one per cable.
- A small zippered pouch with mesh pockets, plus a label maker or masking tape and a pen.
- A small hard case or a sleeve if any charger or camera gear has fragile connector tips.
The rule that keeps the list short: bring only what your devices actually require. A traveler in the one-bag community puts it plainly — one GaN multi-port charger with enough ports for the trip, and one power bank, covers most itineraries. Cables weigh almost nothing, so a spare is cheap insurance; duplicate chargers are dead weight.
| Item | Where it goes | Carry-on or checked |
|---|---|---|
| Wall charger (no battery inside) | Tech pouch, top layer | Either |
| USB-C and Lightning cables | Coiled, bound, labelled bundles | Either |
| Plug adapter | Pouch, top layer | Either |
| Power bank | Pouch or jacket pocket | Carry-on only |
| Spare lithium batteries | Device or battery case | Carry-on only |
| Camera charger and spare batteries | Hard case inside the pouch | Carry-on only for batteries |
Step-by-Step: How to Pack Chargers and Cables for Travel
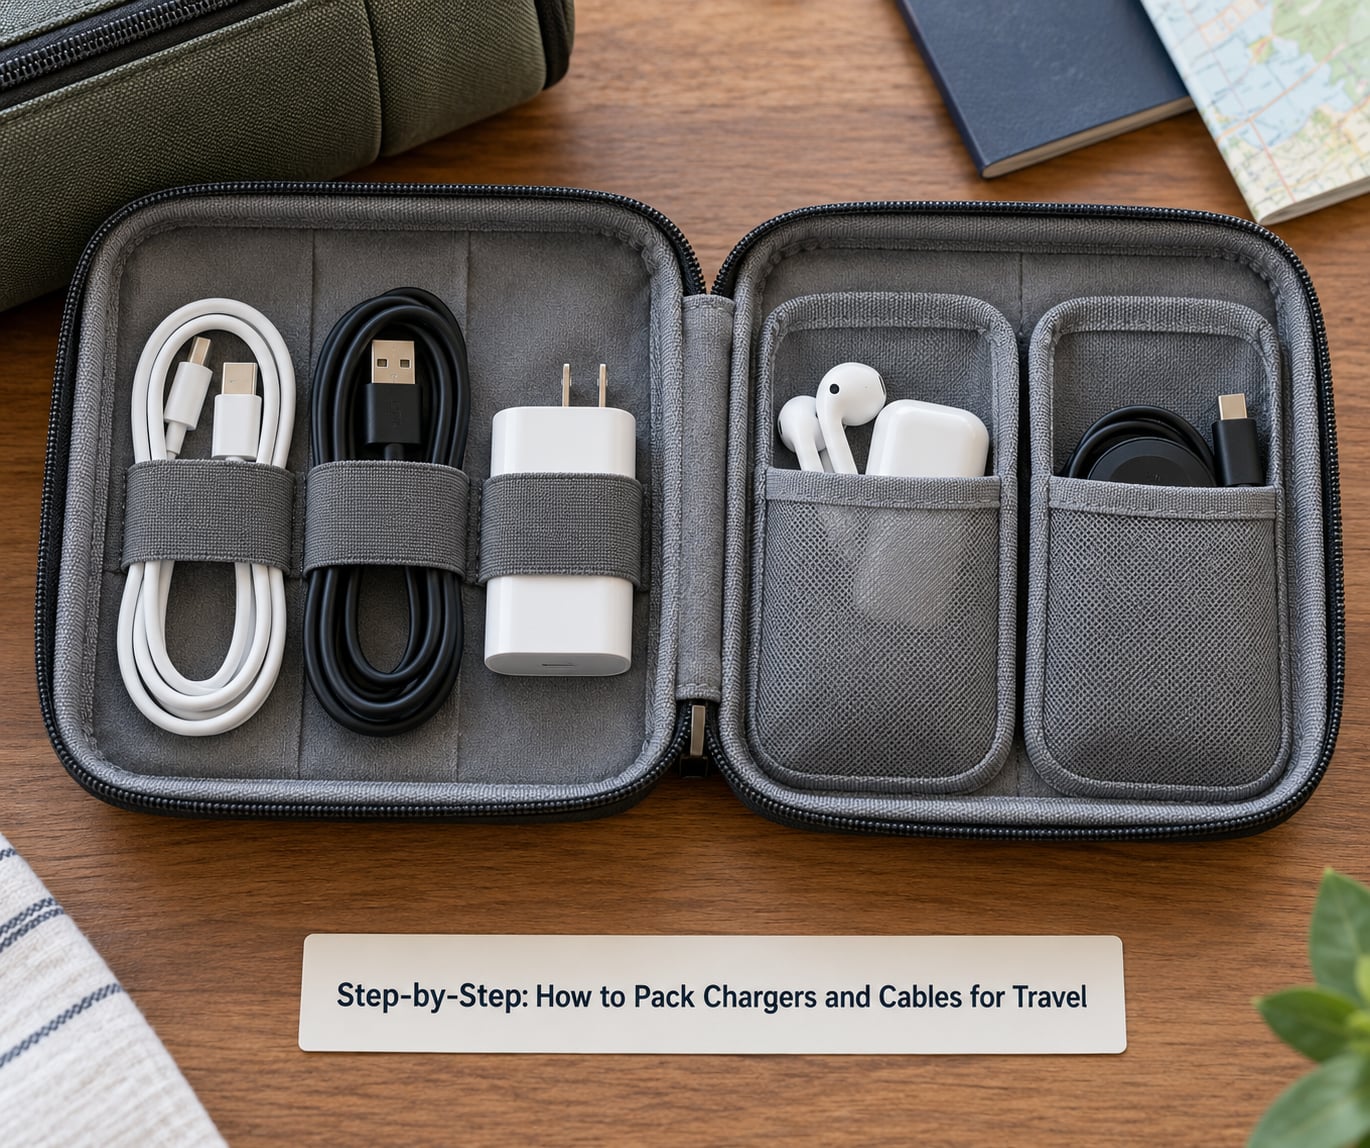
Seven steps, roughly fifteen minutes. Do them at home, not in an airport queue.
1. Sort by device, then delete the duplicates
Empty every bag and drawer that holds charging gear onto the bed. Group everything by what it plugs into: phone, tablet, laptop, camera, watch, earbuds. Now count the cables per device. Two USB-C cables, one short and one long, covers almost every trip. If a device has a built-in cable — many power banks and newer watches do — drop the duplicate entirely.
How to tell it worked: every item on the floor matches one device, and nothing on the list is there because it felt useful a year ago.
2. Test every cable and charger before packing
Plug each cable into the device it belongs to and confirm it actually charges. Watch the charging indicator for ten seconds, because a cable whose internal wires have partly failed can still light up briefly before dropping out. One traveler learned this the hard way — two dead cables on the same trip, one for a phone and one for an eReader.
Check the charger the same way, and flex the cable near both connector heads. A cable that feels gritty, thin, or warm in your fingers is finished, no matter what the jacket looks like.
How to tell it worked: every cable charges, right now, on the device that will travel with you.
3. Coil each cable the roadie way
Musicians wrap cords over themselves for a reason: a cable wrapped onto its own body does not kink at one point and it unrolls without a knot. Lay the cable straight, pick up one end, and wind the length around your fingers or palm, passing the cable over itself each turn. Three loops is plenty. Keep the connector end slightly inside the bundle so it cannot flex.
The over-under method is the alternative: lay the cable in a loose S on a surface, then fold one end back on itself three times. Slower, gentler on the jacket, and good for stiff earbud cords. Skip the tight wrap around the charger body — that is what cracks charger pins.
How to tell it worked: set the coil down and it stays put without springing open.
4. Bind every bundle so it cannot travel
One tie per cable, snug enough to hold the coil and loose enough to slide a finger under. Velcro straps work better than twist ties because you can reattach them mid-trip, and they take up no extra pouch width. A common trick for keeping a tie with its cord: twist the tie onto the cable first, leave a longer tail, then wrap the tail around the bundle.
How to tell it worked: shake the pouch. Nothing rattles, and no cable moves independently.
5. Label each bundle in plain words
Write what the bundle is and what it charges: “USB-C 1m — laptop”, “USB-C 0.3m — phone”, “Lightning — backup”. Masking tape and a Sharpie are fine; a label maker just makes it neater. Labelling matters most for earbuds and USB drives, which otherwise disappear into the bottom of a pouch forever.
How to tell it worked: you can pick the right cable without unpacking the others.
6. Separate chargers and batteries from cables
Chargers and plug adapters go in the top layer of the pouch so you can reach them without unpacking anything — helpful when security asks you to remove a charger. Cables sit in the middle in their own loops or elastic straps. Power banks and spare batteries stay on your body or in the pouch, never in a checked bag.
How to tell it worked: one hand in the pouch finds a charger before security reaches the tray.
7. Protect the fragile parts, then close it up
Cable connectors and charging tips are the parts that break first. Seat each one in a moulded slot, a foam cutout, or a small pocket so nothing presses on the plug. A rigid tin or a padded sleeve protects camera chargers and dongles. Keep the pouch inside your personal item so it can come with you through screening, in the overhead bin, and into the lounge.
How to tell it worked: lift the pouch by its handle or strap and nothing shifts inside.
How to pack chargers and cables for travel by device type
Phone and earbuds: a short USB-C cable under a foot long, plus the case. Long cables are useless at a seat and take up pocket space.
Tablet and laptop: one longer USB-C cable, and a charger with enough wattage for the laptop. Many work travelers carry two chargers on purpose — one stays plugged in at the hotel, one lives in the bag — so nothing gets unplugged and repacked each morning, as one poster on a USB hardware forum described it.
Camera: a charger with the right cable for the body plus two spare batteries in a hard case, kept in your personal item.
Shared gear: a three-in-one cable covers Lightning and micro-USB devices without adding two separate cords to your kit.
Everything you no longer own: an old Lightning cable or a micro-USB lead with nothing to charge is pure clutter. USB-C has absorbed most of what travelers used to juggle.
Common Mistakes
Most packing failures are one of a handful of habits. Each has a simple correction.
Dropping cables into a bag loose. A loose cable finds every other loose cable and turns into a knot you cannot see. Correction: coil, bind, and file each one before it goes anywhere near the bag.
Wrapping the cord tightly around the charger. The wire takes the strain and the plug pins loosen. Correction: coil the cord separately and lay it beside the charger.
Forgetting the plug adapter. The most common packing miss, and the one that cannot be solved at the airport. Correction: check the plug shapes for every stop, and pack the adapter in the top layer.
Not testing anything before departure. A dead cable hidden in a full pouch is worse than a cable you never packed, because you find out at the worst moment. Correction: run the ten-second test in step 2.
Packing connector tips loose. A bent USB-C plug is a broken cable. Correction: seat each connector in a slot or wrap it in a few turns of tissue.
Overstuffing the pouch. A crammed tech pouch takes precious cabin space and jams every zip. Correction: if the zip needs a second pull and a shove, take something out.
Putting a power bank in checked luggage. Lithium batteries generally cannot travel in checked baggage, and a power bank found by screening can be confiscated. Correction: carry-on only, terminals protected, with the cable attached or the terminals taped.
Frequently Asked Questions
Can I bring my charging cable on a plane?
Yes. Ordinary charging cables and wall chargers without batteries are allowed in both carry-on and checked luggage in most countries, and there is no special approval process for them. Keep them in your personal item so you can power a phone during a long flight or a layover. The rules that tighten travel only apply to lithium batteries such as power banks and spare cells.
Do phone chargers go in hand luggage or suitcase?
Either bag works for a charger with no battery inside, so pack it where you will actually reach it. Most travelers keep the whole tech pouch in a personal item that travels under the seat, because checked bags arrive late and a lost charger is harder to replace than a lost bag. Security may ask you to remove a charger at screening, which is easier when it sits on top of the pouch.
Can I take a 10,000 mAh power bank on a plane?
A 10,000 mAh power bank is well under the 100 watt-hour ceiling for spare lithium batteries, so it is allowed in carry-on luggage with no special approval. Airline rules count battery size in watt-hours rather than milliamp-hours, so check the label for the watt-hour figure. Keep it in your personal item, protect the terminals, and never place a power bank in checked baggage.
What power banks are not allowed by TSA?
Anything above 160 watt-hours is prohibited on passenger aircraft, and a power bank between 100 and 160 watt-hours may travel in carry-on only, with airline approval and a limit of two units. Damaged, swollen, or recalled batteries are also refused, as are loose batteries in checked luggage. Because power bank rules vary slightly by carrier and country, confirm with your airline before departure.
How do I keep charging cables from tangling in my bag?
Coil each cable onto itself, secure it with one tie or Velcro strap, and store the bundles separately in elastic loops or a zippered mesh pocket. Labelling each bundle also stops you unrolling the wrong cable to search the pile. A rigid case beats a soft pouch when cables arrive already tangled, because nothing shifts inside.
What can I do if a charging cable stops working while traveling?
Check the port and the connector tip for lint or a bent pin first, since a dirty phone port is often the real fault. If the cable’s jacket is frayed near the connector, wrap several turns of electrical tape around the damaged section to get through the trip. Beyond that, buy a replacement at any phone shop rather than gambling on an untested cable for the rest of the trip.
Conclusion
The fastest version of how to pack chargers and cables for travel takes fifteen minutes at home: spread everything out, delete the duplicates, test each cable, coil and bind it, label the bundle, and zip it all into one pouch that stays in your personal item.
Start with the three things that cause most trip failures. Inventory what your devices need, test each cable so a dead one never reaches the airport, and separate the chargers from the cables. Everything else on this list is a refinement, and the system already works without it.