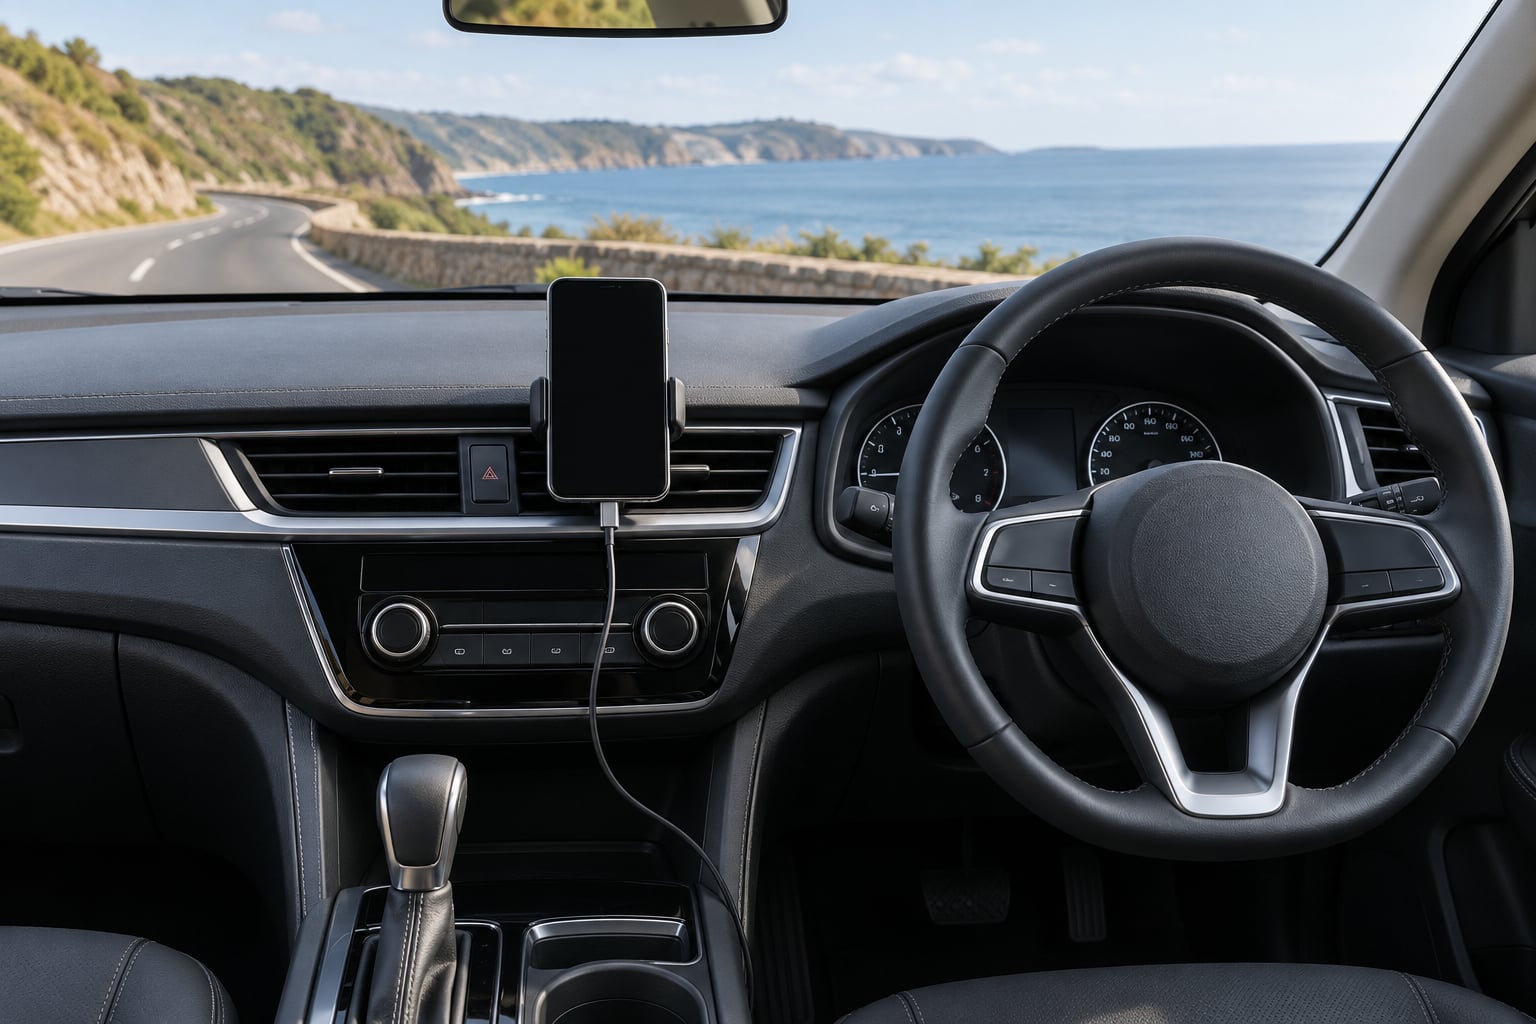
Mounting a phone in a car safely means putting it where you can read the navigation prompt in a glance, low on the dash on the passenger side of the steering wheel, held by a mount that grips the phone rather than relying on suction alone. Pick the position first, clean the surface, install the holder, route the cable away from controls, and test everything while the car is parked.
If you have a phone mount already and just want it properly placed, start at step 1 and work down. The whole job takes about fifteen minutes the first time and two minutes every time after that.
Table of Contents›
- What You Need
- How to Mount a Phone in a Car Safely: Step-by-Step
- 1. Choose a Safe Mounting Location
- 2. Select the Right Phone Mount
- 3. Clean and Prepare the Mounting Surface
- 4. Install and Secure the Phone
- 5. Route the Cable and Quiet the Notifications
- 6. Test the Setup Before You Drive
- 7. Recheck the Mount Every Time You Drive
- Quick Checklist: How to Mount a Phone in a Car Safely in Five Minutes
- Common Mistakes
- Tips for Using a Mounted Phone Without Distraction
- Frequently Asked Questions
- Is it safe to mount a phone on the dashboard?
- Is a windshield phone mount better than a dashboard mount?
- Can I use a vent phone mount without damaging the car?
- How should I charge my phone in a car safely?
- Does mounting a phone in a car make it legal to use while driving?
- What should I do if my phone mount falls or overheats?
- Conclusion: Make the Mount Safe Before You Drive
What You Need
You need very little: a mount that suits your car’s interior, your phone and its case, a charging cable, a cloth for cleaning, and the vehicle owner’s manual.
The manual matters more than people expect. It tells you where the airbags live, and a mounted phone in the wrong spot turns a survivable crash into a face full of glass. It also flags which dashboard surfaces are soft-touch plastic that peels when you pull a pad off it.
A quick comparison of the four common mounting styles:
| Mount type | Best location | Install effort | Dashboard damage risk | Vibration risk |
|---|---|---|---|---|
| Suction cup | Windshield, smooth glass | Low | Very low | High in heat |
| Air vent clamp | Centre or passenger-side vent | Low | Low | High on bumpy roads |
| Adhesive pad or dash disc | Flat dash panel | Medium | Medium to high | Low |
| Magnetic or MagSafe cradle | Dash or windshield base | Low | Depends on base | Medium without a gripper arm |
Most people end up with a clamp on a vent for short trips and a bolted or weighted base for daily driving. Where you place it depends as much on your dash shape as on the mount.
How to Mount a Phone in a Car Safely: Step-by-Step
1. Choose a Safe Mounting Location
Choose a spot low on the dash, close to the windscreen line and to the passenger side of the steering wheel, so the screen sits inside your natural glance path without crossing it.
Owner forums reach the same conclusion almost word for word: low on the dash, just right of the wheel, just above the sightline. It keeps the navigation arrow in the same area your eyes already move to when you check the road.
Reject any position that does one of the following:
- Covers any part of the road, lane markings or the speedometer
- Sits in the driver’s side airbag deployment zone, which is the padded dash area in front of the driver
- Blocks a camera, radar sensor or sensor housing mounted behind the windscreen
- Needs you to twist your shoulders or lean forward to read it
- Runs the cable across the steering wheel or over a button bank
To confirm the position is right, sit in the driver’s seat and check the screen against the horizon. Everything on the display should be readable with your head in a neutral position, and the road ahead should stay fully visible around the mount.
A windshield mount gives a bigger, brighter screen because it sits higher and out of the dash shadow. A dashboard mount sits lower and steadier, and many drivers find the windshield position pushes the phone into their sightline once glare hits it. Pick the one your car makes easy and test it in daylight, not at night.
2. Select the Right Phone Mount
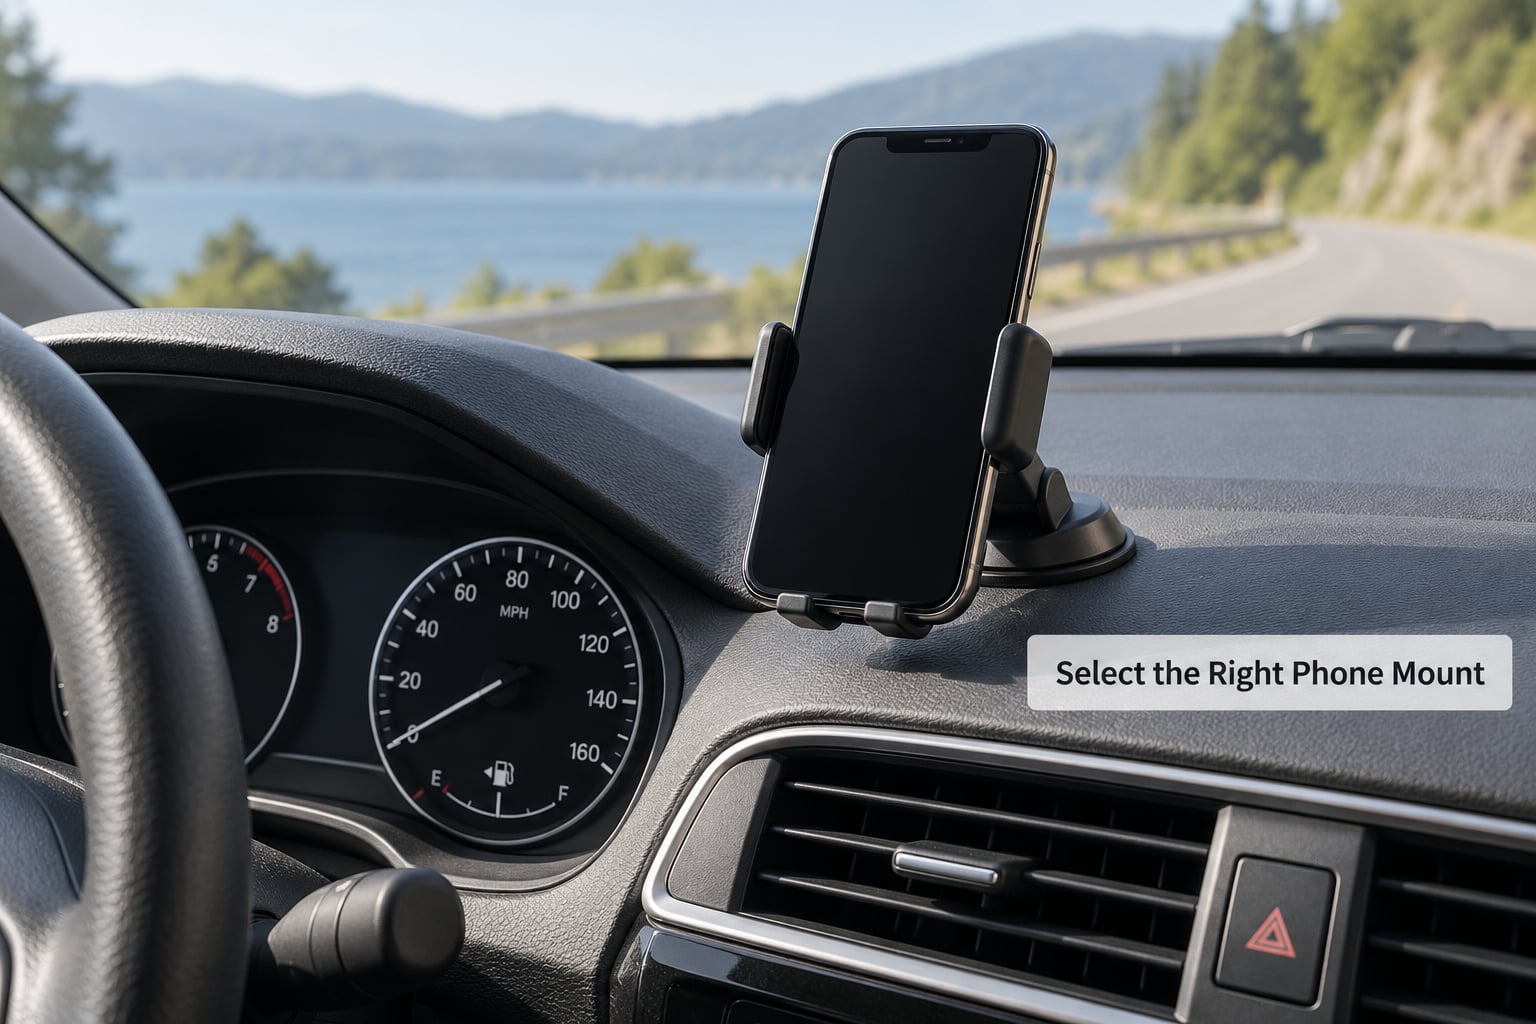
Choose the mount type that matches where the phone goes and how rough your roads are, not the one with the longest feature list.
Vent mounts clamp onto a louvre and take about ten seconds, but they rattle over expansion joints and potholes and they can pop out mid-turn. Suction cups are cheap and completely removable, though heat softens the rubber and textured or vinyl dashboards give them nothing to grip, which is why they let go in July.
Adhesive pads and dash discs hold firm but leave residue, and on soft-touch plastic they can take the coating with them when you pull them off later. Magnetic and MagSafe mounts are the easiest to use one-handed, though a magnet alone leaves the phone wobbling because the cradle adds weight the magnet does not support. A cradle with a gripper arm or a side clamp fixes that, and it is what drivers report as vibration-free.
Check two things before you buy or install: that the arms open wider than your phone with its case on, and that the cradle does not press on the screen edges, which is where scratches start. Heavy phones with thick cases need the larger bracket, not the adjustable one that promises a wider range but pinches at the top.
3. Clean and Prepare the Mounting Surface
Clean the surface with a damp cloth, dry it, and wipe it once more with a little isopropyl alcohol to remove oils and wax before anything sticks.
Dust and hand oils are the reason most adhesive mounts fail in week two. On textured plastic, run the alcohol cloth across the area and let it dry fully, which takes a few minutes on a warm dash.
Follow the adhesive’s own instructions, since they decide whether it holds. Most 3M-style pads and Command strips want the surface cool to the touch, firm pressure across the whole pad for around thirty seconds, and then a wait of several hours, often until the next day, before you load any weight onto them. Mounting on a sun-heated dash in the parking lot means the adhesive is setting in the wrong temperature range, and it will let go later in the day.
How you can tell it worked: the pad feels fully bonded with no lifting at the corners when you press the edges down, and the phone stays put when you grab it and lift.
4. Install and Secure the Phone
Fit the mount according to its type, then load the phone and tighten just enough that it cannot shift.
For a vent clamp, push the clip over the louvre until it seats against both sides of the vent housing, which is what stops the rattle. For a suction cup, press the cup firmly once and reset it if it looks partly seated, because a half-seated cup is the usual reason it drops later. For a magnetic base, attach the plate to the phone or inside the case first, then bring the phone up to the magnet rather than sliding it across, which is what protects the back glass.
Then do the movement test. Push the phone forward, back, up and down, and shake the mount the way a pothole would. If the phone moves a few millimetres, tighten the clamp one more notch. If it moves more than that, the mount is the wrong size and no amount of tightening will fix it.
Tightening is where people damage things. Cranking a vent clip harder does nothing except stress the louvre, and squeezing a cradle against a case can put the screen in contact with the bracket edge. Turn the knob or the tension screw, not the phone.
How you can tell it worked: the phone stays in the same position through the movement test, and the mount does not visibly flex at the base.
5. Route the Cable and Quiet the Notifications
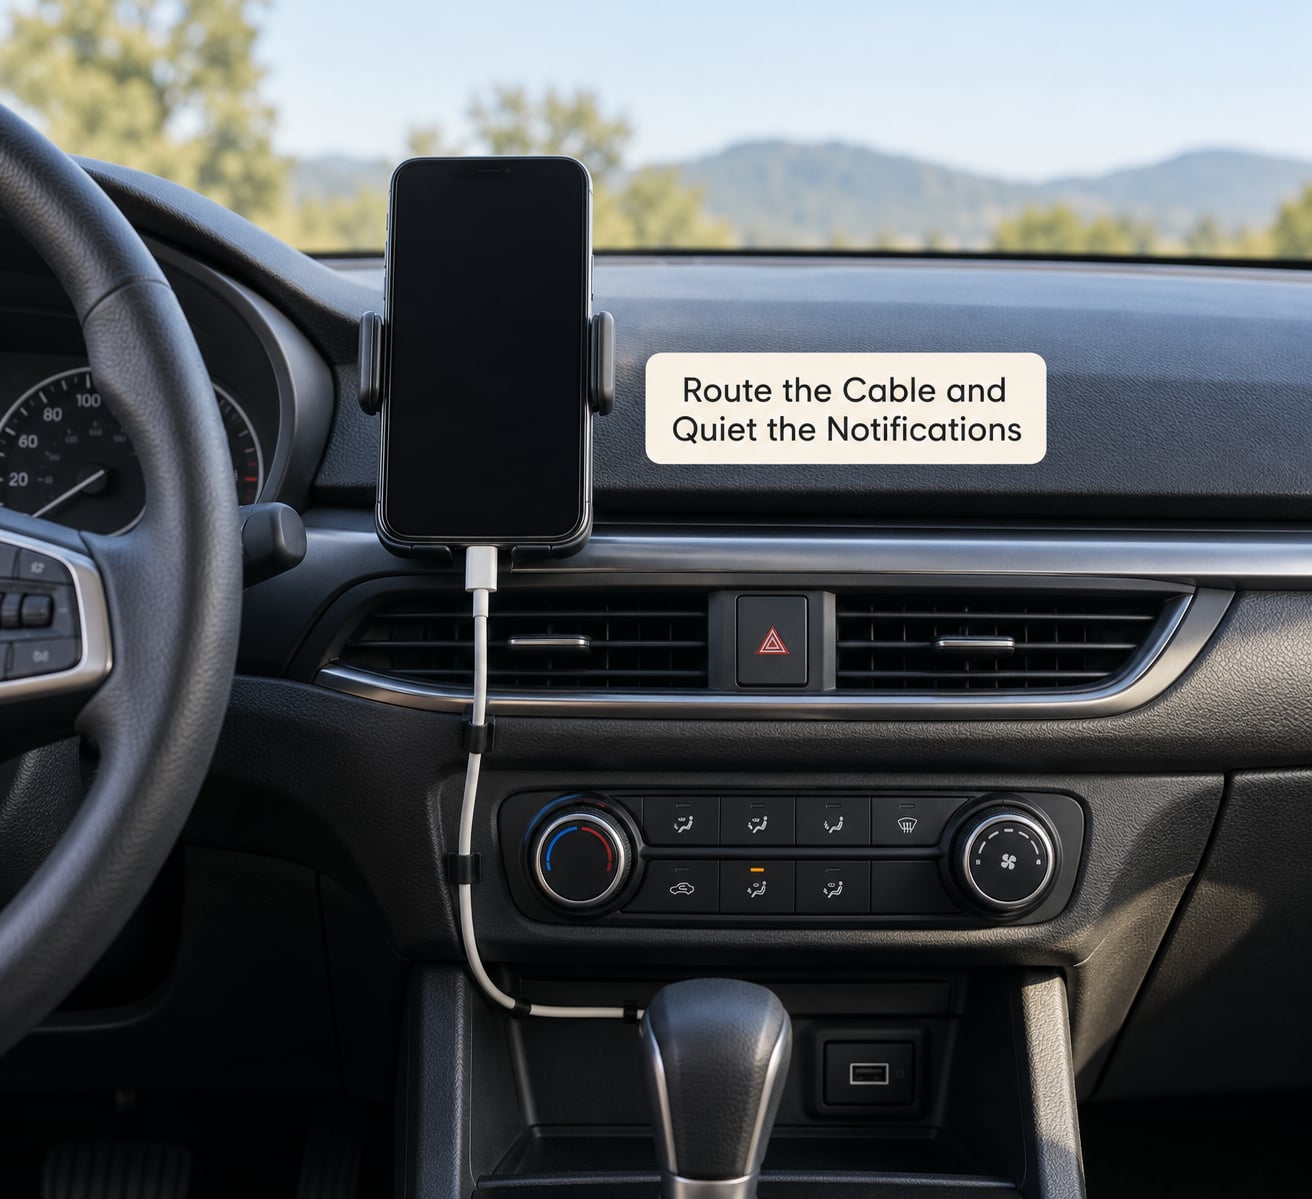
Route the charging cable down the side of the centre console or along the passenger-side trim, never across the steering wheel, the gear selector, or the driver’s knees.
Cable management is the part almost every guide skips. A cable that crosses the wheel tethers the phone and turns your mount into decoration, and a cable draped over the console reaches the driver’s thigh on every gear change. Run it down a seam or a vent channel, leave enough slack at the base so a bump cannot pull the connector, and keep it away from anything hot.
Then set the phone up so it does not beg for attention. Turn on Do Not Disturb for the drive, leave navigation audio as the primary output, and pick up calls through the car’s microphone and speakers rather than the handset. Set navigation to speak directions and avoid visual overlays that need a tap to dismiss. Apps that talk back to you, messaging previews and social notifications are the ones that pull your attention, so they go off entirely.
On iPhone and Android, the car screen itself can take over with Apple CarPlay or Android Auto once paired, which means your phone can stay face-down in the pocket while the car’s display runs navigation and audio. Older cars without that hardware get the same result from the phone in the mount with voice prompts on.
How you can tell it worked: you can turn the steering wheel fully in both directions, change gear and reach for anything in the cabin without moving the cable.
6. Test the Setup Before You Drive
Test everything while the car is parked with the engine running, so you find problems before you are moving.
Work through this list before the first trip: the mount does not shift when you press the phone, the screen is readable in daylight glare, the buttons and ports on the phone are still reachable if you truly need them, the cable is charging, the voice prompt is audible over the engine, the audio routes to the car and not the handset speaker, and the phone is reachable for an emergency call without fighting the cradle.
That last point catches people out. Test placing the phone back into the mount while your eyes are off the road, in a parked car, and make sure it goes in on the first try. Guessing at a mount one-handed at seventy on the motorway is how phones end up on the floorboard.
How you can tell it worked: navigation starts on the car’s speakers within a few seconds of moving off, and you did not have to touch the phone once.
7. Recheck the Mount Every Time You Drive
Make a five-second check part of your pre-drive routine: press the phone, glance at the base, tug the cable, and confirm the view of the road is clear.
Mounts work loose slowly. A vent clip loses tension, a suction cup creeps down the glass, an adhesive pad works its way out of its own edge. A quick push before you pull out of the driveway catches all three.
Remove or change the setup when it becomes uncomfortable rather than adapting to it. If you find yourself leaning forward to read the screen, if you have to lift the phone up to see the map, or if the cable has pulled the mount a few degrees off flat, the fix is a different position, not a squint. Take the mount off, take a photo of where it went with your phone before you pull the adhesive, and reassess the surface when it has cooled down.
Quick Checklist: How to Mount a Phone in a Car Safely in Five Minutes
For readers about to drive right now, in order: low dash position on the passenger side of the wheel, mount of the right type for your interior, surface cleaned and dry, phone clamped and given the movement test, cable routed away from controls, Do Not Disturb on, and one parked test of navigation and audio.
Common Mistakes
The most common errors are all about placement and about trusting hardware that is not right for the surface, and each one has a simple correction.
- Mounting in the driver’s side airbag zone. The padded dash in front of the driver is where the airbag deploys. Move the mount to the passenger side of the wheel or the centre of the dash.
- Mounting high enough to intrude on the forward view. Anything that crosses the horizon line costs you a glance you cannot spare. Lower it so the top of the screen sits below the line of sight over the bonnet.
- Trusting a suction cup on a textured or vinyl dash. Vacuum needs a smooth surface. Put a smooth disc down first and cup to that, or choose a clamp.
- Installing adhesive on a hot or dusty panel. Clean and cool the surface, press the pad for thirty seconds, and leave it unloaded for several hours. Adhesive is the number one cause of permanent dash damage that owners regret.
- Running the cable over the wheel or the console. Follow a trim seam down to the centre console instead.
- Using the phone while driving manually. A mount does not make touching the phone legal. Set the route before you move.
- Skipping the parked test. A mount that looked fine on the driveway rattles on the first expansion joint.
If the mount is installed but misbehaving, these are the causes worth checking:
| Problem | Cause | Fix |
|---|---|---|
| Phone wobbles over bumps | Magnet supports the centre of gravity but the cradle adds unsupported weight | Add a gripper arm or use a side-clamp cradle |
| Phone falls out on rough roads | Vent clip not seated in both sides of the vent housing | Reseat the clip fully, or move to a weighted base |
| Suction cup releases in summer | Rubber softens with dash heat; textured dash has no grip | Use a smooth dash disc, or park the phone out of direct sun |
| Mount slides on the dash | Adhesive set with dust or heat, or the surface is curved | Clean and cool the surface, re-press the pad, or clamp it instead |
| Phone gets hot in the cradle | Clamp covers the back of the phone where heat collects | Use a gripper arm or magnetic mount, and shade it from direct sun |
| Screen scratched at the edges | Case pressed hard against the bracket while loading | Loosen slightly and load the phone by its edges, not face-first |
If you drive a rental, a leased car or one you share with someone else, skip adhesive entirely. A dash disc with a suction mount on top, a vent clamp, or a cup-holder style cradle leaves no trace when you hand the keys back.
One more thing worth checking on a used car: look at the trim around the dash and centre console for screws or fasteners that were not factory. Previous owners have drilled into dashboards, and a mount screwed into a trim panel near an airbag or a sensor is a hazard you did not install.
Tips for Using a Mounted Phone Without Distraction
Set the phone up for voice, not for touch. Turn-by-turn directions spoken through the car speakers mean you never need to look at the screen except to confirm a turn you are about to miss.
Ask for less information, not more. Siri or Google Assistant will happily tell you the weather, your next meeting and a recipe while you drive, and every answer pulls your attention. Queuing directions and playing audio before you start the engine keeps the trip quieter.
Use glances, and keep them short. The useful pattern is glance, act, return. A couple of seconds over the navigation prompt at a red light is a reasonable use of the mount. Reading a message at forty-five in a sixty zone is not.
Watch the temperature. A phone on a sunlit dashboard in summer runs hot, and a cradle that grips the back of the phone adds to it. Ask for a mount that holds from the sides or the corners, and use a windshield position with a sun shade if you park outside in 2026. The same goes in winter, where a screen left freezing will lose touch response until it warms.
Know what the law says where you live. Most jurisdictions restrict holding a phone while driving, and many have extended that to touching a mounted screen, with fines rising per offence. Rules differ by state, province and country, so check your own local rules rather than assuming a mount covers you.
Frequently Asked Questions
Is it safe to mount a phone on the dashboard?
Yes, as long as the mount sits low, on the passenger side of the steering wheel, and outside the driver’s side airbag deployment zone. Check that it does not cover the road, the gauges, or any camera or sensor behind the windscreen. Test the position while parked before your first drive, and follow the instructions that came with your vehicle.
Is a windshield phone mount better than a dashboard mount?
It depends on glare and sightline. A windshield mount sits higher, so the screen is brighter and easier to read, but that height can push the phone into your view of the road and it shakes more on rough surfaces. A dashboard mount sits lower and steadier. Try both positions in daylight and keep whichever does not make you lean or narrow your view of traffic.
Can I use a vent phone mount without damaging the car?
Usually yes, if the clip is the right size for the louvre and you do not force it. Seat the clip against both sides of the vent housing so it cannot stress the plastic, and never tighten it beyond finger pressure. Thin or brittle vent slats are the ones that crack, so move to a weighted base if the mount creaks when you turn the vents.
How should I charge my phone in a car safely?
Run the cable down a trim seam or the side of the centre console, keeping it off the steering wheel, the gear selector and your knees. Leave slack at the plug so a bump cannot pull it out, and keep the cable away from hot vents and any area an airbag deploys into. A wireless charging cradle avoids the cable entirely if your phone supports it.
Does mounting a phone in a car make it legal to use while driving?
No. A mount makes the phone visible and physically hard to pick up, but it does not change the law. Most jurisdictions restrict holding a phone in motion, and many now include touching a mounted screen, sometimes unless the device is in hands-free mode with no touch input. Rules, fines and enforcement vary by state, province and country, so check your local requirements.
What should I do if my phone mount falls or overheats?
Pull over before adjusting anything, since fixing a mount while moving is its own hazard. If it keeps falling out, check whether the suction cup is seated, the vent clip is fully in the housing, or the clamp is loose. If the phone is overheating, move it out of direct sun, take it off the mount to cool, and switch to a gripper arm or side-clamp cradle that does not cover the back of the phone.
Conclusion: Make the Mount Safe Before You Drive
Start with the position, not the mount: low on the dash, passenger side of the steering wheel, clear of the road, the gauges and the driver’s side airbag.
Everything after that is detail. The right car phone mount for your interior keeps the phone readable and physically out of reach, so navigation runs on voice and your hands never leave the wheel. If it vibrates, creeps or gets hot, change the mount rather than the position of your head.
Follow the instructions that came with your phone, your mount and your vehicle, and check the phone and hands-free rules where you actually drive. Laws differ by state, province and country, and only you can confirm what applies on your route.