Installing a custom launcher on Android takes about ten minutes and needs no root. You install the launcher from the Google Play Store, open it once, and set it as the default home app through Settings, then press the Home button to confirm it took. Everything stays reversible: the stock home screen is still installed, and you can hand the Home role back in about thirty seconds.
The catch is that Android versions and phone makers arrange the same job differently. On Android 12 and later the path runs through Settings > Apps > Default apps > Home app. On Android 10 and 11 it is usually Settings > Apps > Home app, and on older releases there is a plain Settings > Home entry. Phone skins such as One UI, ZUI, MIUI and ColorOS add their own battery and auto-start switches on top, which is where most people get stuck.
Below I walk through the whole flow, then cover what a launcher does and does not change, how to undo it, and why your new launcher sometimes snaps back to the stock one after a reboot.
Table of Contents›
- What a custom launcher changes (and what it doesn’t)
- What You Need Before You Start
- Which Launcher to Install First
- Step-by-Step: How to Install a Custom Launcher on Android
- Step 1: Choose a launcher that supports your Android version
- Step 2: Download and install the launcher from Google Play
- Step 3: Open the launcher for the first time
- Step 4: Set the launcher as the default home app
- Step 5: Grant only the permissions the launcher actually needs
- Step 6: Test the home screen, gestures and app drawer
- Installing a launcher on Android TV or a Fire TV Stick
- How to Switch Back to the Stock Launcher
- Why Your New Launcher Keeps Reverting to the Stock One
- Common Mistakes and Quick Fixes
- Frequently Asked Questions
- Do I need to root my phone to install a custom launcher?
- Will installing a custom launcher delete my apps?
- Are custom launchers safe to install?
- How do I go back to the default Android launcher?
- What is the best custom launcher for Android?
- How do I create a custom Android launcher app?
- Conclusion
What a custom launcher changes (and what it doesn’t)
A custom launcher is a third-party app that takes over your home screen and app drawer. It controls the wallpaper, the icon grid, the dock, the page indicators, and how you swipe and tap. It does not touch your apps, your notifications, quick settings, or the Settings app itself.
This is the part that confuses people. Android developers describe it plainly: swapping the home launcher only changes the screens the launcher is responsible for, so every app you open afterwards looks and behaves exactly the same. Swapping to a launcher will not speed up WhatsApp or change how your camera app works.
What you do get is control over layout. Most launchers let you place icons anywhere, run a themed or icon pack, add gesture shortcuts, hide apps you never open, and set multiple home pages with different widgets per page. The stock home app on many budget and mid-range phones offers a fraction of that.
Two other things change as a side effect, and both are worth knowing before you start. Backing up and restoring the stock layout is generally not available, because each launcher stores your arrangement in its own way, and an uninstall wipes it. And the gestures built into the phone maker’s skin, like Samsung’s swipe for split screen, sometimes stop working because the new launcher takes over the gesture area.
What You Need Before You Start
You need an Android phone or tablet running a version the launcher supports, roughly Android 7 or newer for anything current. Anything older than that and you are choosing between abandoned apps and launcher clones.
You also need Google Play Store access. If your phone came from a seller with a custom ROM and no Play Store, you will need to install the Play Store first or use a trusted APK source, and that changes the risk profile. I cover that case further down.
Before you install anything, take two minutes to photograph your current home screen. Pull down the notification shade and check how many home pages you have, which icons sit in the dock, and whether any folders or widgets are worth recreating. Recreating that layout in a new launcher takes ten minutes. Trying to reproduce it from memory the week after an uninstall is a bad afternoon.
Make sure you have a couple of hundred megabytes of free storage and a charger nearby. Launcher installs are small, but the first-run setup can pull themes and icon packs that are not.
One last check: if the phone is managed by a school or a company, the Home role may be locked by policy. If the Home app row in Settings is greyed out or the app prompt to set a default never appears, that is the reason, and no amount of retrying will change it.
Which Launcher to Install First
There is no single best custom launcher, because the right pick depends on how much you want to fiddle and how much you want to be left alone. This short list covers the reliable options most people land on, with no scoring because the differences are about taste rather than performance.
| Launcher | Best for | Cost model |
|---|---|---|
| Nova Launcher | Deep customization: per-page icon packs, gesture shortcuts, folder stacking, night mode scheduling | Free with a paid tier that removes the promo bar |
| Lawnchair | People who want a clean look with no ads and no data collection | Free, ad-free, open development |
| Smart Launcher | A very different feel, with category-based lists instead of a traditional grid | Free with optional ads in the free tier |
| Total Launcher | Many homescreen themes plus built-in backup of your layout | Freemium |
| Pixel Launcher | People on Pixel phones who want the stock experience plus extra widgets | Free, Pixel and Android Go devices mainly |
| Neo Launcher | Speed and a small memory footprint, with a free icon pack bundled | Free, optional paid tier |
Whichever you pick, install one at a time. Testing three launchers in a row leaves you unsure which one set the odd behaviour, and each one claims the Home role as you go.
Step-by-Step: How to Install a Custom Launcher on Android
Step 1: Choose a launcher that supports your Android version
Check your Android version first, because it decides which Settings menu you will use later. Go to Settings > About phone and read the Android version line on that screen. If you cannot find it, tap the search bar at the top of Settings and type “version”, which jumps straight to the same screen. Tapping Build number seven times only unlocks developer options, which is a separate thing.
Then read what the launcher’s listing says about compatibility, and read the recent reviews rather than the top ones. A one-star review from three months ago tells you far more than a thousand five-star ones from years ago, because that is where the reports of breakage on a new Android release show up.
Look at the developer name before you install. A launcher is a high-privilege app: it draws the screen you see every time you unlock, and most ask for usage access or accessibility so they can read your app list and react to swipes. Install from a known developer with a real update history, and skip anything that only offers itself through “unknown sources” or an APK mirror.
Step 2: Download and install the launcher from Google Play
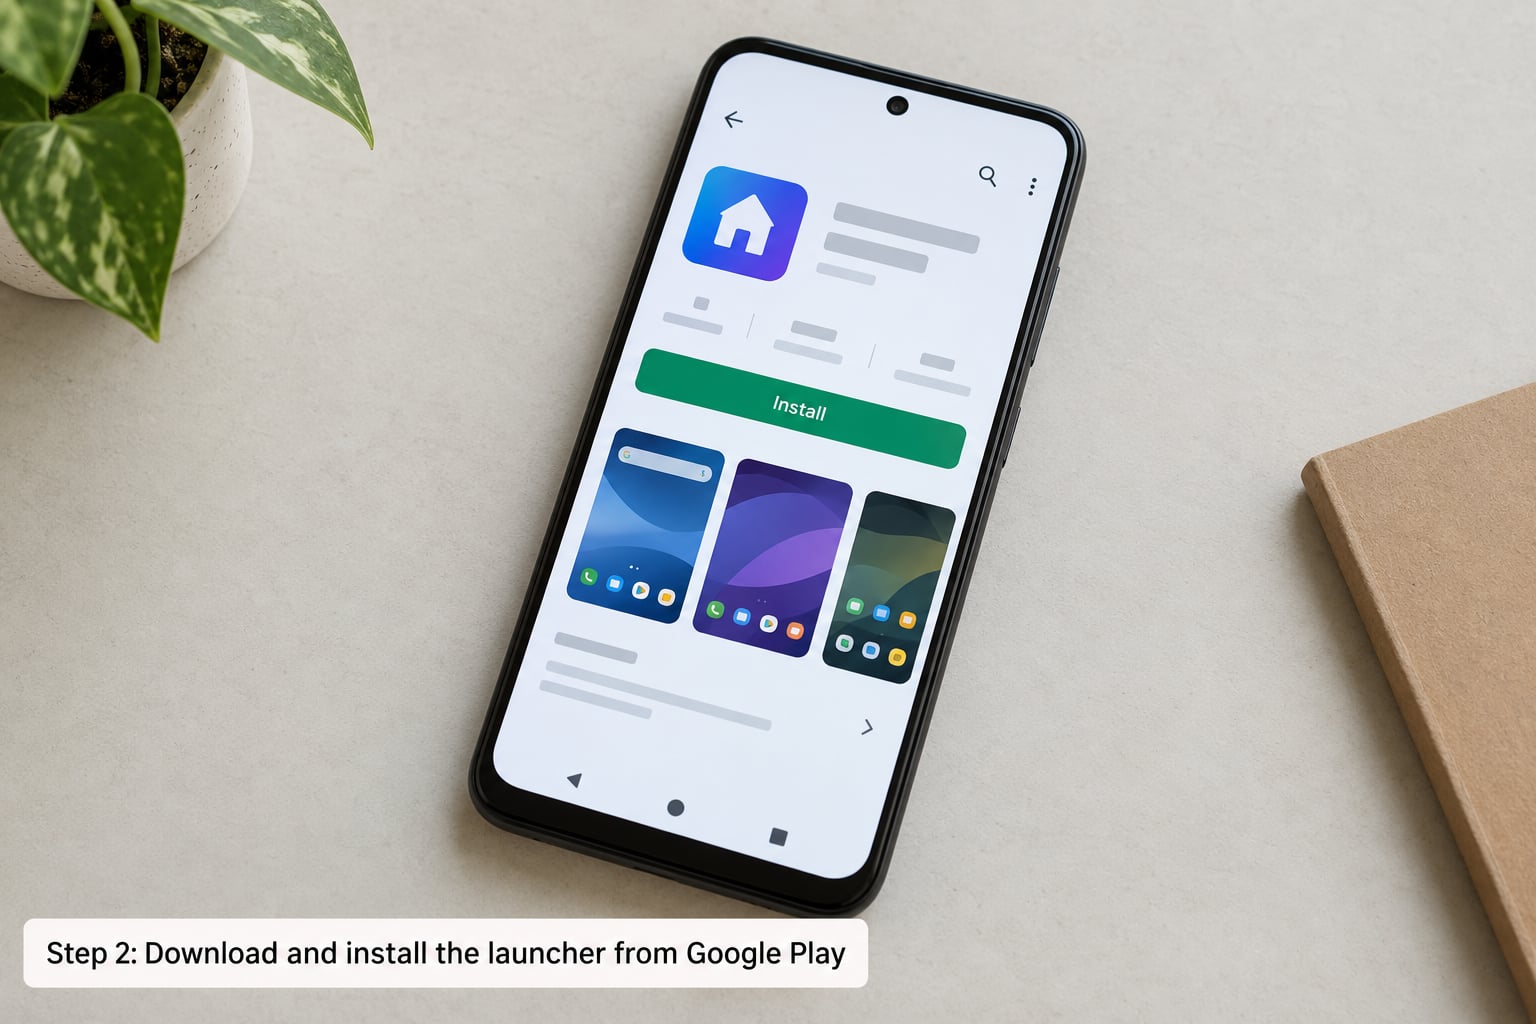
Open the Play Store, tap the search icon at the top, and type the launcher’s name. Check the developer name in the listing matches what you expected, then read the permissions listed under “App info” before you commit.
Tap Install and leave the phone alone until it finishes. On a slow connection this can take a couple of minutes. When the button changes to Open, the launcher is installed but not yet active, which is the next step.
If Play Protect interrupts with a warning that the app may be harmful, do not dismiss it. On the Play Store path this is rare, and it usually means the listing is a knockoff with a similar name. Back out and find the developer’s official listing.
Step 3: Open the launcher for the first time
Tap Open, or find the new app in your app drawer and tap it once. Almost every launcher shows a short first-run wizard: pick a theme or a wallpaper, choose an icon pack, and sometimes pick whether you want gesture navigation or the three-button layout.
Pick a theme now if you want one. It is much easier to judge a theme on a fresh home screen than on a screen you have already filled with a dozen icons.
Read each permission prompt as it appears and answer for the feature in front of you. If the wizard offers a desktop and calendar widget, granting the calendar read permission is expected. If it asks for accessibility before you have turned on a single gesture, that is the wrong moment, and you can say no. The app still works, and you can grant it later in Settings if you end up wanting the feature.
Step 4: Set the launcher as the default home app
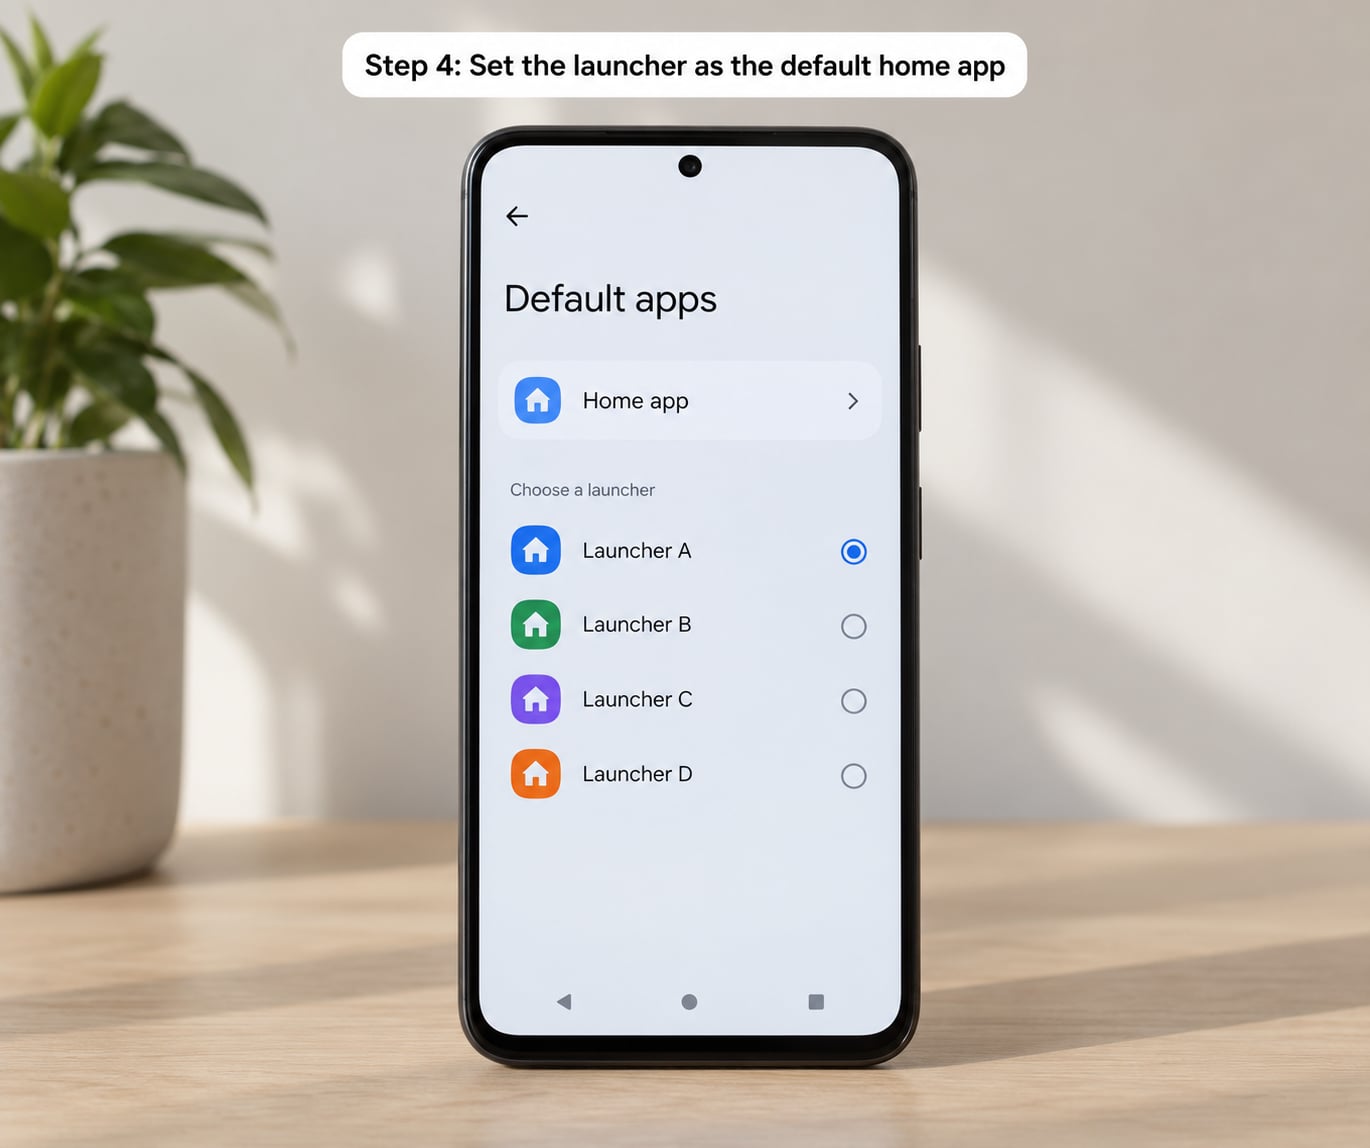
Most launchers prompt you the moment you open them, with a button that reads Set as default or Add to Home. Tapping that opens a system dialog saying something like “Set Nova as home app?” with a large Add to Home button. This is the fastest route and it works on every recent version.
If the prompt did not appear, or you dismissed it by accident, set it manually. The path depends on your Android version:
- Android 12 and later: Settings > Apps > See all apps or Default apps > Home app. Tap your launcher in the list, then confirm.
- Android 10 and 11: Settings > Apps > Home app or Home > choose the launcher.
- Android 9 and below: Settings > Home > press the Home key on a second launcher to switch, or pick it from the list.
- On some phones and tablets: many devices also let you press and hold the Home button, then choose from the same list of installed home apps.
Samsung’s One UI puts this under Apps > Default apps > Home app, with the label written as “Home app” rather than “Default launcher”. Xiaomi’s MIUI hides it in Apps > Default apps > Home screen. The wording changes, the destination does not.
Once you confirm, press the Home button. If your new home screen appears, the role was handed over.
Step 5: Grant only the permissions the launcher actually needs
After the switch, open the launcher’s own settings and turn on the features you actually intend to use. Each one maps to a permission you can see in the prompt, so you can decide as you go.
Reading the app list and hiding apps needs Usage access. Gesture shortcuts and auto actions need Accessibility. Badge counts on icons need Notification access. Custom ringtones and vibration per contact need nothing special, because the launcher is already the home app.
Skim the launcher’s Data safety section in the Play Store as well. Free tiers sometimes include analytics, and knowing that up front is better than wondering later.
Step 6: Test the home screen, gestures and app drawer
Run through the essentials before you start rearranging. Press Home and confirm you land on the new home screen. Swipe up to open the app drawer and check that every app is present, with sensible labels rather than a wall of identical generic icons. Swipe left and right between pages. Then test your back gesture and the recents gesture.
Gesture navigation is where third-party launchers most often clash with the phone maker’s own gestures. Owners report broken swipe-up and app-switcher behaviour with third-party launchers, and some find they work better with the navigation buttons instead. If your swipe-up opens something unexpected, try switching Settings > System > Gestures > Navigation mode to the three-button option.
Check the notification shade and quick settings too. Those belong to the system, not the launcher, so they should look exactly as they did before.
Once the basics are right, you can move your icons, build folders, and hide what you never use. The most common mistake here is deleting an app while long-pressing its icon to move it. On most launchers the uninstall option sits in that same menu, so drag carefully.
Installing a launcher on Android TV or a Fire TV Stick
The process is the same with two differences. On Android TV, side-load the launcher from a known source with a browser or a file manager, or install it from the Play Store on models that include one, and set it as the home app through the same Default apps path. The launcher needs a remote-friendly interface with large focusable icons, which is exactly what the TV-oriented forks of popular launchers are built for.
On a Fire TV Stick, Google Play Protect tends to block launcher installs from outside the Amazon Appstore, and the stock Fire OS launcher is tied to the device. Developers building TV launchers hit this constantly, and the standard workaround is installing the APK over ADB with wireless debugging enabled. That route is advanced, and for most people the honest answer is that Amazon’s home screen is not swappable without it.
How to Switch Back to the Stock Launcher
You do not uninstall the stock home app to go back, and you should not. Leave it installed, because Android falls back to it automatically if the third-party launcher is removed, and because you may want to switch again later.
To hand the Home role back, go to Settings > Apps > Default apps > Home app on Android 12 and later, or Settings > Apps > Home app on Android 10 and 11, and pick your phone maker’s launcher from the list. On older versions, Settings > Home and choose it there. Then press Home and confirm the stock home screen is back.
If the launcher was using accessibility to handle gestures, turn that permission off afterwards. A launcher sitting in the background with accessibility access is the one thing worth tidying up, because it can read what is on your screen.
Uninstalling the launcher is a separate decision. Do it if it kept crashing or you never want to see it again. Know first that your layout goes with it, unless the launcher offered a backup file and you exported one.
Why Your New Launcher Keeps Reverting to the Stock One
This is the single most reported problem with third-party launchers, and it is not an Android bug so much as a phone maker’s power policy. The fix chain that comes out of support threads about making Nova stick as default is short and specific.
- Turn off battery optimization for the launcher. Settings > Apps > see the launcher > Battery > Unrestricted. Aggressive battery saving kills background processes after a screen lock, and a killed home app loses the Home role on the next unlock.
- Enable auto-start in the phone maker’s security app. On Xiaomi that is Security > Autostart, on Vivo and Oppo it is under the manager or i Manager settings, on Huawei it is App launch with three manual switches. All three options are off by default for apps you did not install from the store.
- Grant the permissions the launcher asked for. A launcher missing usage access or notification access often gets reset by the system.
- Reboot once. This is the step people skip. After a reboot the launcher re-registers itself as the Home app if its auto-start permission is on.
On a Lenovo Legion, one owner described the OEM skin as making the phone hot and draining the battery, and wanted it gone without rooting. A custom launcher solves the look, not the heat: the skin’s background services keep running whether or not its home screen is on show. That is worth knowing before you expect a battery win.
Other owners report having to set the launcher as default again after every screen unlock, which is the same root cause seen from the other side. If the reversion happens only after a screen lock, skip straight to battery optimization.
Common Mistakes and Quick Fixes
| Symptom | Likely cause | Fix |
|---|---|---|
| Launcher installed, home screen unchanged | The Home role was never assigned | Settings > Apps > Default apps > Home app, then pick the launcher and press Home |
| Reverts to stock after reboot or screen lock | Battery optimization and OEM auto-start are off | Set battery to Unrestricted, enable autostart in the security app, reboot once |
| Home button feels slow or shows a blank screen | Two home apps registered for the role | Uninstall the launcher you no longer use, then reassign the Home app |
| Swipe up opens the wrong thing | Gesture navigation conflict with the skin | Settings > System > Gestures > Navigation mode, switch to three-button navigation |
| App labels all read “App” or icons look identical | The launcher lacks the permission to read your app list | Settings > Apps > launcher > App language or Permissions, allow Usage access |
| Icons moved, apps missing | Long-press menu used and the app was uninstalled | Reinstall from the Play Library, then re-add it to the home screen |
| Install blocked with a Play Protect warning | APK from outside the Play Store, or a knockoff listing | Cancel, then install the official listing from Google Play |
| Cannot set a default home app at all | The device is managed by a work or school policy | Ask your administrator; the Home role is restricted by policy |
| Home screen fine, notifications missing badges | Notification access not granted | Settings > Apps > launcher > Notifications, allow them |
Two smaller notes. If your phone has no Play Store at all, install Google’s Play Store first, then the launcher, and be strict about the source. And if you are testing a launcher that is not on the Play Store, enable Install unknown apps for that one browser or file manager only, then turn the permission off again straight after.
Frequently Asked Questions
Do I need to root my phone to install a custom launcher?
No. Launchers are ordinary apps from the Play Store and need no root at all. Root was once required for launchers that went beyond the home screen, and that is no longer true on current Android versions. Anyone who tells you to root before changing your home screen is describing an outdated method. The only time rooting comes up is if you want to replace the system’s own launcher app entirely, which you should not do.
Will installing a custom launcher delete my apps?
No. A launcher only draws your home screen and app drawer, so it cannot uninstall anything. The real risk is a mis-tap: most launchers put an uninstall option in the same long-press menu you use to move an icon. Drag icons out of the menu instead of tapping the trash icon, and check the Play Library at the top of the drawer if something goes missing, since nothing is actually deleted by moving a home screen icon.
Are custom launchers safe to install?
The mainstream ones are. Nova, Lawnchair, Smart, Total and Pixel Launcher are long-established apps with public update histories, and they show a Data safety section in the Play Store. The caution is about permissions, not about the app. A launcher can legitimately hold usage access to list your apps and accessibility to handle gestures. Read the Data safety section, grant only what you use, and avoid APK mirrors where the file you download may not be the file the developer shipped.
How do I go back to the default Android launcher?
Open Settings, then Apps, then Default apps, then Home app on Android 12 and later. On Android 10 and 11 the path is Settings, then Apps, then Home app. Choose your phone maker’s launcher from the list and confirm, then press the Home button. Do not uninstall the stock launcher first: leaving it in place is what makes the switch back instant, and it means you can change your mind again later.
What is the best custom launcher for Android?
It depends on how much you want to change. Nova Launcher is the deepest option for icon packs, per-page theming and gesture shortcuts. Lawnchair is the pick if you want no ads and no data collection. Smart Launcher suits people who prefer category lists to a grid. Neo Launcher suits people who care most about speed and memory. Install one, use it for a week, and only then decide whether it beats what your phone shipped with.
How do I create a custom Android launcher app?
If you mean building one rather than installing one, the starting point is declaring the CATEGORY_HOME intent filter in your app manifest, which tells Android your app is a home screen. You then implement the home screen and app drawer activities and let the system assign you the Home role. Android’s official developer documentation on home screen apps covers the required intents, and a lot of developers building these on Android TV start from Flutter or Kotlin projects shared on developer communities.
Conclusion
Here is the short version of the whole job. Install one launcher from Google Play, open it, tap Set as default or use Settings > Apps > Default apps > Home app, press Home, and check the app drawer and your gestures before you rearrange anything.
Three habits keep it painless. Photograph your current home screen first, because the layout is not exported. Keep the stock launcher installed, because that is your way back. And if the new home screen disappears after a reboot, set the launcher to unrestricted battery use and switch on autostart in your phone maker’s security app, then reboot once.
Start with the launcher list above, pick the one whose approach suits how you like a home screen to work, and give it a week before you judge it.