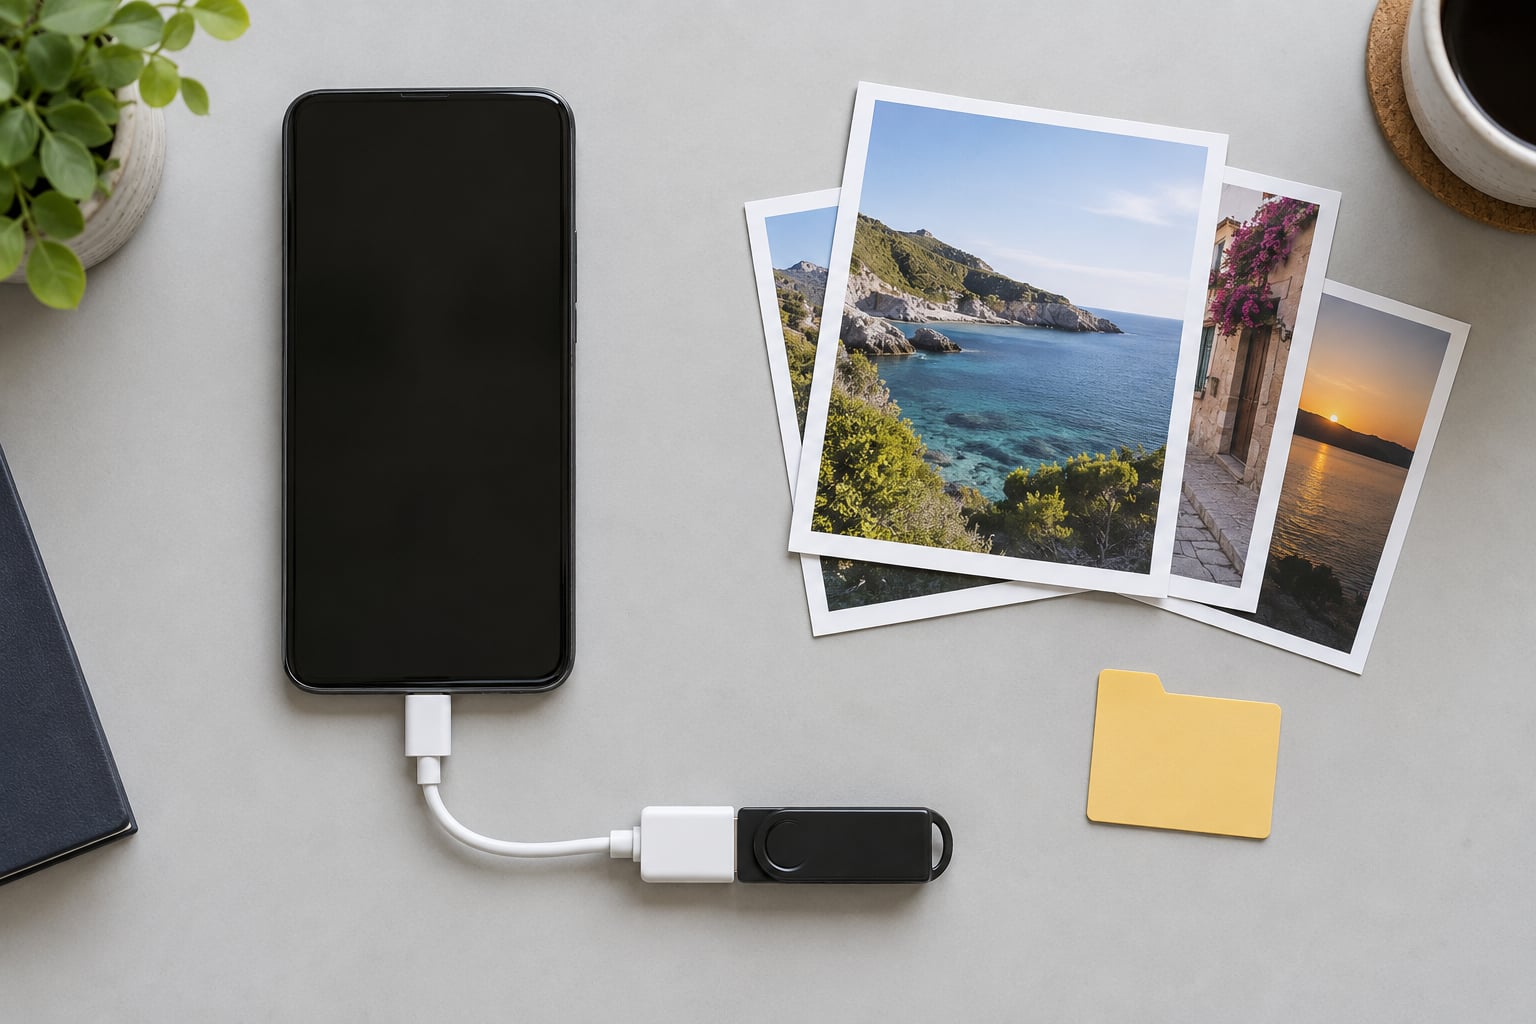
To use a USB flash drive with an Android phone you need three things: USB On-The-Go (OTG) support in the phone, an OTG adapter that matches your port unless the drive has a USB-C plug of its own, and a file manager app. The connection itself takes about two minutes, and Android mounts the drive as an external storage volume right beside internal storage.
That matters when your phone is full, when you are moving several gigabytes of video off the device, or when you need to hand someone a set of files without a computer, a cloud account or internet. A flash drive is also the cheapest way to keep a backup that does not depend on anyone else’s server.
This guide covers the whole workflow on current Android versions, plus the brand menu paths that trip people up on Samsung, Pixel and Xiaomi phones. Paths shift a little between versions, so the steps below name the setting to look for rather than pretending one layout covers everything.
Table of Contents›
- What You Need
- Step-by-Step: How to Use a USB Flash Drive with an Android Phone
- How to Use a USB Flash Drive with an Android Phone
- 1. Check Whether Your Phone Supports USB OTG
- 2. Prepare the Flash Drive
- 3. Connect the Drive and Find It
- 4. Transfer Files to the Flash Drive
- 5. Transfer Files Back to the Phone
- 6. Safely Eject the USB Flash Drive
- Common Mistakes
- Tips for Reliable Android USB Storage
- Frequently Asked Questions
- Can I connect a USB flash drive directly to my Android phone?
- Why does my Android phone not recognize the USB flash drive?
- What file system should I use for an Android USB flash drive?
- Can I use a USB flash drive to transfer photos from Android to a computer?
- Why does my Android phone stop recognizing the flash drive after I unplug it?
- How do I safely remove a USB flash drive from an Android phone?
What You Need
The short version is three essentials and one optional extra. Without the first two, nothing else matters.
- An Android phone with USB OTG support. This is a hardware feature, not a setting. Almost every phone sold in the last decade has it, but a handful of budget models and some regional variants do not.
- A USB flash drive. A standard USB-A stick works with an adapter. A USB-C flash drive plugs straight in. Dual-connector sticks, the kind with a USB-A end and a USB-C end, work both ways.
- A data-capable OTG adapter with the connector that matches your phone: USB-C to USB-A, or micro-USB to USB-A.
- A file manager. Google Files by Google ships on most Android phones and handles copying and ejecting. Samsung has My Files, Xiaomi has its own Mi file manager, and third-party options such as CX File Explorer or Solid Explorer add dual-pane browsing and archive tools.
- Optional: a powered USB hub if you plan to use an external hard disk or SSD rather than a small flash drive.
Two terms get tangled together, so here is the clean version. A flash drive is the storage device itself. USB OTG is the phone’s ability to act as a USB host, which means supplying power and talking to an attached device. OTG is the feature; the flash drive is the thing you plug in to use it.
| Your phone port | Drive connector | What you need | Result |
|---|---|---|---|
| USB-C | USB-A | USB-C to USB-A OTG adapter | Works if the phone supports OTG |
| USB-C | USB-C | Nothing, or a short USB-C to USB-C cable | Works without an adapter |
| USB-C | Dual USB-A and USB-C | Nothing | Works, pick the end that fits |
| micro-USB | USB-A | micro-USB OTG adapter | Works on older phones with OTG |
| USB-C | External HDD or SSD | Powered USB hub | Spinning disks often fail on bus power alone |
| Any | Charge-only cable in place of an adapter | A data-capable cable | Nothing happens at all |
Step-by-Step: How to Use a USB Flash Drive with an Android Phone
Run through these in order and the same sequence works on almost every phone made in the last several years.
How to Use a USB Flash Drive with an Android Phone
- Confirm your phone supports USB OTG by checking the manufacturer specification.
- Connect the OTG adapter to your phone, then plug the flash drive into the adapter.
- Pull down the notification shade and look for a USB or external storage notification.
- Open your file manager and tap the USB storage entry under Internal shared storage.
- Select the files you want, choose Copy or Move, and target the USB drive.
- Open the drive again to confirm the files arrived, then use Eject before unplugging.
A successful connection gives you two signals: a short connection notification, and a new volume inside the file manager. If you get one without the other, something is half working, and the troubleshooting table further down will tell you which half.
1. Check Whether Your Phone Supports USB OTG
The fastest check is the manufacturer’s own specification page, where OTG is usually listed under connectivity or ports. If the spec sheet is vague, run the drive test instead: plug in a USB-C drive or a known-good OTG adapter and see whether anything shows up in the file manager. That answers the question in under a minute.
Most phones do not have an OTG switch in Settings because there is nothing to switch. If your device has Developer options enabled, some builds include a USB debugging entry there, but leaving USB debugging off is the safer setting day to day.
A test that fails does not always mean your phone is broken. People often assume a dead port when the real culprit is a faulty adapter, and adapter failure is far more common than phone failure. Try a second adapter before you start blaming the hardware.
There is a smaller set of phones where charging works through the port but data never flows. Owner reports on current Android flags a Galaxy A57 on One UI 8.5 and Android 16 as one example, where the handset charges normally while USB data transfer refuses to work with any drive, mouse or keyboard. When every accessory fails on a device that charges fine, suspect the USB controller rather than your software.
2. Prepare the Flash Drive
Check free space before copying anything, then confirm the file system. Android reads FAT32 and, on current versions, exFAT natively. NTFS is read-only at best and invisible without a third-party app. APFS, the macOS default, is not supported at all.
| File system | Android support | Single file limit | Best used when |
|---|---|---|---|
| exFAT | Native on current Android | No practical limit | Default choice for videos and large archives |
| FAT32 | Native everywhere | 4 GB per file | Older phones, or drives shared with very old gear |
| NTFS | Not mounted by default | No practical limit | Never the first choice for a phone |
| APFS | Not supported | n/a | Avoid unless you reformat |
FAT32’s 4 GB ceiling catches people out with long video files. A 5 GB recording will not copy, no matter how much room the drive has. exFAT removes that problem and is the format most people land on unless a device is old enough to predate native support.
Reformatting wipes the drive, so copy anything important off it first. On Windows, use File Explorer, plug the drive in, open its properties, go to the Tools tab and run Format with exFAT selected. On macOS, Disk Utility with the MS-DOS (FAT) option as the format works, but Format as exFAT is the closer match.
One historical wrinkle explains a lot of failed attempts. Android removed USB mass storage (UAS) support in version 6.0, so advice written before that point no longer applies, and some very old drives that used to connect simply never will again. If a guide tells you to install drivers or root your phone, it predates modern Android.
3. Connect the Drive and Find It
Connect the adapter to the phone first, then insert the flash drive into the adapter. Doing it in that order avoids a detection hiccup on some devices. Your phone should vibrate or chime and drop a USB notification in the shade.
Then open the file manager. Where the drive appears depends on the brand skin:
- Pixel and stock Android: swipe down for the USB notification and tap it, which opens the drive directly. Otherwise open Files, tap the hamburger menu, and look under Internal shared storage for a USB drive entry.
- Samsung One UI: open My Files, tap the three-dot menu and choose USB storage. If nothing appears, pull down the notification shade and check the USB connection notification, where a file transfer option usually lives.
- Xiaomi HyperOS and MIUI: open the Mi file manager, tap the phone or drive icon at the bottom of the screen, and pick the USB device from the list. MIUI hides external volumes behind that toggle rather than listing them straight away.
On newer Samsung builds, a USB preferences panel can report the connection as controlled by the phone itself, and the switch sometimes refuses to move to connected device. That blocks both computer transfers and OTG accessories. Restarting the phone clears it more often than not; if it returns on every connection, that is a hardware-level fault worth raising with the manufacturer.
A mount point is not a location you visit directly. Android manages it for you, usually under a path like /storage/usbdisk0, and your file manager presents it as a normal folder. You never need to type that path.
4. Transfer Files to the Flash Drive
Navigate in your file manager to the folder holding the files, typically DCIM for camera photos or Download for everything else. Long-press a file to select it, then long-press a second file to add it to the selection. Tap the three-dot menu and choose Copy to, then pick the USB drive as the destination.
The difference between Copy and Move matters more than people expect. Copy leaves the original on your phone, which is what you want for a backup. Move empties the file out of internal storage, which is what frees up room. Moving then finding your phone cannot see the file any more is a bad surprise if you meant to keep a copy.
Wait for the progress indicator to finish. Large video transfers over USB 2.0 speeds are slow, and interrupting one partway through is the most common cause of files that appear on the drive but will not open. Once the copy completes, reopen the USB volume and compare the file name and size against the original.
If you are freeing space rather than backing up, move first and verify second. Open a photo from the USB drive, confirm it renders, and only then delete the phone copy.
5. Transfer Files Back to the Phone
The reverse flow uses the same menus. Open the USB drive in the file manager, select the photos, videos or documents you want, and choose Copy to or Move to Internal shared storage. Pick Download for general files or DCIM/Camera for images and video so the gallery app picks them up without extra steps.
Android usually scans the new folder straight away. If imported photos stay invisible in the gallery app, open it and clear its cache, or restart the phone, and the media store will rescan.
For a large batch, copy in smaller groups rather than one giant selection. Several hundred files at once can time out, and a partial batch is far easier to re-run than a full one.
6. Safely Eject the USB Flash Drive
Always eject before you unplug. Android caches writes for speed, which means some of your copied files may still be sitting in memory when the transfer bar disappears. Pull the drive at that moment and you get truncated or unreadable files.
Open the USB drive in your file manager and tap the eject or unmount icon. On Pixel, it is an eject symbol in the top bar of the drive view. My Files on Samsung shows an eject option in the menu. After ejecting, the volume disappears from the file manager, and only then is it safe to unplug.
Some phones and file managers do not offer an eject control at all. In that case, scroll the notification shade and look for a disconnect option on the USB notification first. Failing that, open the USB volume, wait a full minute with no activity, and then unplug. It is not ideal, but a short pause is far safer than yanking it immediately.
If you do unplug without ejecting and a file later refuses to open, re-copy just that file. Corruption from an early unplug affects the file being written at that moment, not the whole drive.
Common Mistakes
Work down the table in order. The top rows cover the large majority of cases.
| Symptom | Likely cause | Fix |
|---|---|---|
| No notification, no drive in the file manager | Charge-only cable or adapter with no data lines | Replace it with a data-capable adapter |
| Nothing happens on a USB-C to USB-C cable | Cable designed for phone-to-phone, not phone-to-drive | Use a USB-C flash drive directly instead |
| Drive appears then vanishes | Loose fit or an underpowered port | Re-seat the drive, try another port or adapter |
| Unsupported file system error | NTFS or APFS formatting | Reformat as exFAT or FAT32 |
| Large video will not copy | FAT32 4 GB per-file limit | Reformat as exFAT or split the file |
| USB preferences shows controlled by this device | Samsung One UI state not switching | Restart the phone, then reconnect |
| Transfer stalls or files will not open | Unplugged before the write finished | Re-copy and always eject first |
| Works on one phone, not another | That second phone lacks usable OTG, or its port is faulty | Confirm OTG support, then test another adapter |
One last diagnostic worth knowing: if the phone charges through the adapter but no storage ever appears, and a second known-good adapter fails the same way, the problem is almost certainly the phone’s port or USB controller. Software settings cannot fix that, and no amount of rooting helps. Stop troubleshooting and get the hardware checked.
Tips for Reliable Android USB Storage
A few habits cover nearly every failure that comes up with phone and flash drive combinations.
Eject every single time. It takes two taps and it is the only thing standing between a finished transfer and a corrupt file. This is the habit that matters most.
Spend a little more on the adapter. Thin marketplace adapters fail intermittently or work in only one orientation, and that intermittent behaviour is maddening to diagnose because it never looks like a hardware fault. A short adapter with a solid connector also avoids cable strain at the phone’s port.
Keep file names simple. Android handles letters, numbers, spaces, hyphens and underscores comfortably. Colons, asterisks and very long names can cause copies to fail or arrive renamed. A date prefix such as trip-03-holiday keeps things sortable without special characters.
Check free space on the destination, not just the drive. Copying to the phone needs room in internal storage, and a nearly full phone will fail the copy in confusing ways.
Use a powered hub for anything with a motor. Flash drives and small SSDs draw little power and run fine straight from the phone. Spinning hard disks draw enough to cause connection drops, and a powered hub solves it.
Format once, in exFAT, and leave it alone. Reformatting on a whim is how people lose data, and a drive formatted on a Mac will not appear on Android until it is changed to exFAT or FAT32.
Encrypt anything sensitive. A flash drive travels easily and can be read by any computer. Android can put sensitive folders behind a password inside an encrypted archive, but for documents that would be dangerous to lose, keeping them off portable storage entirely is the safer call.
Frequently Asked Questions
Can I connect a USB flash drive directly to my Android phone?
Yes, if the drive has a USB-C plug and your phone has a USB-C port. Plug it straight in and Android mounts it as external storage with no adapter. If your drive is the older USB-A style, you need an OTG adapter that matches your phone port: USB-C to USB-A or micro-USB to USB-A. Dual-connector drives have a USB-A end and a USB-C end, so you pick whichever side fits your phone.
Why does my Android phone not recognize the USB flash drive?
The usual causes are a charge-only cable or adapter with no data lines, a drive formatted as NTFS or APFS, and a phone without OTG support. Check the file system first by reformatting the drive as exFAT. Then swap in a known-good data-capable adapter. If a second adapter fails on a phone that charges normally, the port or USB controller is likely faulty rather than the drive.
What file system should I use for an Android USB flash drive?
Use exFAT. It has no practical single-file size limit and current Android versions read it natively, so large videos copy without problems. FAT32 also works everywhere but caps each file at 4 GB, which blocks long recordings. NTFS is read-only at best and usually invisible without a third-party app. APFS is not supported at all, so a Mac-formatted drive will never appear on Android.
Can I use a USB flash drive to transfer photos from Android to a computer?
Yes. Connect the drive to your phone, copy the photos across, eject it, then plug the drive into your computer. Android uses MTP for direct phone-to-computer transfers, and that connection fails more often than flash drive transfers do. Going through the drive sidesteps cable problems entirely and works with any computer that has a USB port, including ones too old for the latest Android file transfer protocol.
Why does my Android phone stop recognizing the flash drive after I unplug it?
That usually means the phone is trying to rescan or remount a device that has already gone, which happens with cheap adapters and loose connectors. Reconnect the drive and check the notification before opening the file manager. If it mounts fine every time but the file manager needs a restart to list it again, a file manager restart or a phone reboot clears it. Repeated failures with one adapter point to that adapter, not the phone.
How do I safely remove a USB flash drive from an Android phone?
Open the USB drive in your file manager and tap the eject or unmount icon, then wait for the volume to disappear from the list before unplugging. Android buffers writes for speed, so a file can still be in memory after the copy bar finishes. Pulling the drive too early leaves truncated files that refuse to open. If your file manager has no eject control, check the USB notification shade and otherwise wait a full minute with no activity.
Start with the three things that account for most failures: confirm your phone supports OTG, make sure the drive is formatted as exFAT, and use an adapter that carries data. Connect, copy, confirm the files landed, then eject before you unplug. Everything beyond that is a variation on the same workflow.